This blog entry is the third and last part of the series „Create APEX in AWS“. Here I describe the installation and configuration of Apache Tomcat and the deployment of the ORDS application in Tomcat. Later I will explain the installation of the Webserver Nginx and configure it to access APEX via Apache Tomcat and ORDS.
Information about the installation of the APEX application in AWS can be found here. The installation and configuration of Oracle Data rest service is described here.
Installation Apache Tomcat on the EC2 Container
As root: Download and extract the software:
[root@]# cd /usr/local
[root@]# wget http://mirror.netcologne.de/apache.org/tomcat/tomcat-9/v9.0.20/bin/apache-tomcat-9.0.20.tar.gz
[root@]# tar -xvf apache-tomcat-9.0.20.tar.gz
[root@]# mv apache-tomcat-9.0.20 tomcat9
Create the Linux Service for the Tomcat. It is necessary for the automatically start and stop of the Tomcat by the Server reboot. Create the File tomcat.service:
[root@@]# vi /etc/systemd/system/tomcat.service
Content:
[Unit]
Description=Apache Tomcat Web Application Container
Wants=network.target
After=network.target
[Service]
Type=forking
Environment=JAVA_HOME=/usr/lib/jvm/java-1.8.0-openjdk-1.8.0.201.b09-0.amzn2.x86_64/jre
Environment=CATALINA_PID=/usr/local/tomcat9/temp/tomcat.pid
Environment=CATALINA_HOME=/usr/local/tomcat9
Environment=’CATALINA_OPTS=-Xms512M -Xmx1G -Djava.net.preferIPv4Stack=true‘
Environment=’JAVA_OPTS=-Djava.awt.headless=true‘
ExecStart=/usr/local/tomcat9/bin/startup.sh
ExecStop=/usr/local/tomcat9/bin/shutdown.sh
SuccessExitStatus=143
User=root
Group=root
UMask=0007
RestartSec=10
Restart=always
[Install]
WantedBy=multi-user.target
*Note: for the production environment the tomcat should be started from non-privileged user! In my test case I will start and top the tomcat as the user root.
Enable Service tomcat and start it:
[root@]# systemctl enable tomcat
[root@]# systemctl start tomcat
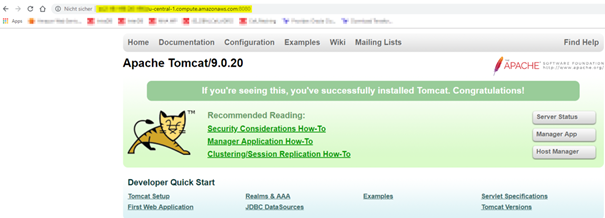
Check if Tomcat is running and accessible from the Browser:

Configure Apache Tomcat for the access APEX via Oracle Rest Data Service (ORDS)
Copy the Java binary ords.was and apex images into Tomcat directory:
[root@]# cp /home/apexuser/ORDS/ords.war /usr/local/tomcat9/webapps/
[root@]# mkdir /usr/local/tomcat9/webapps/i
[root@]# cp -Rf /home/apexuser/apex/images/* /usr/local/tomcat9/webapps/i
Change the permissions for the ORDS Directory for the user tomcat (created during the tomcat installation):
As root:
[root@]# chmod -R 777 /home/apexuser/ORDS/ords/conf/
Restart the Apache Tomcat:
[root@]# systemctl restart tomcat
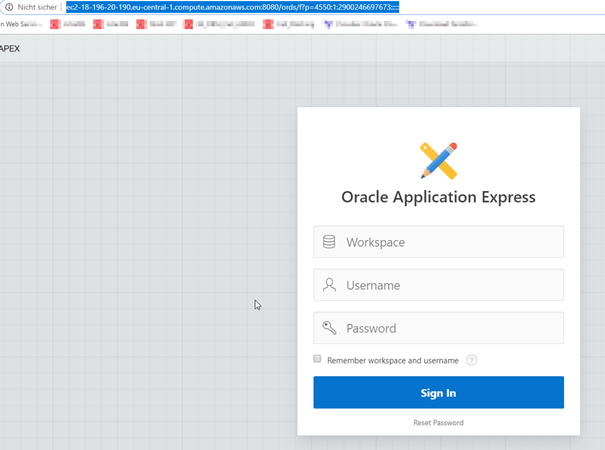
Test the access to APEX via Apache Tomcat:

It works!
Install Nginx HTTP Server:
[root@]# amazon-linux-extras install nginx1.12
[root@]# systemctl enable nginx
[root@]# systemctl start nginx
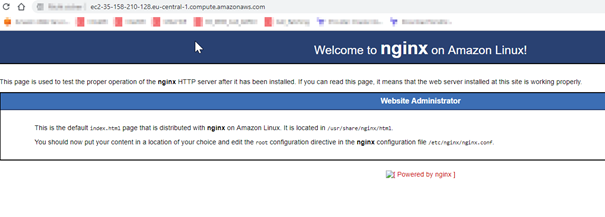
Check the availability of nginx in Browser:

Configure Nginx to forward requests from Tomcat-ORDS-APEX
Check the Public Hostname/IP Address of the EC2 Container in the AWS Console:

Create the Cache Directory:
[root@]# mkdir -p /var/cache/nginx/one
Create the File default.conf.
[root@]# vi /etc/nginx/conf.d/default.conf
File Content:
proxy_cache_path /var/cache/nginx/one levels=1:2 keys_zone=one:128m;
server {
listen 80;
listen [::]:80;
server_name ;
proxy_cache one;
location / {
proxy_set_header X-Forwarded-Host $host;
proxy_set_header X-Forwarded-Server $host;
proxy_set_header X-Forwarded-For $proxy_add_x_forwarded_for;
proxy_pass http://127.0.0.1:8080/;
}
}
Save the file and check the nginx configuration:
[root@]# nginx -t
Output:
nginx: the configuration file /etc/nginx/nginx.conf syntax is ok
nginx: configuration file /etc/nginx/nginx.conf test is successful
Reload nginx configuration:
[root@]# nginx -s reload
Test Apex via Nginx (Port 80):
http://<Public IP of EC2 Container>/ords/

It works!!!
Previously Blog posts in this series:
- Create Oracle APEX Environment in the Amazon Cloud with RDS: Part 1 – Overview
- Part 2: Create the Oracle APEX Database in Amazon Relation Data Service (RDS)
- Part 3: Configure APEX with Oracle Rest Data Service (ORDS) in the EC2 Container


