

Many of you are certainly familiar with multifactor authentication, or MFA for short. With MFA, another factor is requested in addition to the user name and password, which basically represents the first factor. An additional one-time password is generated, sent and requested by the application or service to which you want to log in. Usually, an SMS or email is sent to a previously configured account or mobile phone. This contains a small password or a token that must be entered in the corresponding application.
Another possibility for MFA is the use of an authenticator application. There are various applications for the most common mobile phone operating systems. In my company, for example, we use the Microsoft Authenticator. Such an authenticator app supports several authentication methods. Among others also the TOTP method. See: https://de.wikipedia.org/wiki/Time-based_One-time_Password_Algorithmus
In general, an encrypted secret is exchanged and the validity is calculated with an algorithm. The calculated token changes every 30 seconds.
How to implement such an MFA in APEX?
A few years ago, someone on the Oracle forum posted the actual code for the generation. See: https://forums.oracle.com/ords/apexds/post/google-authenticator-totp-0920
We use this code as the basis for calculating a token that is based on a secret assigned to the user. We wrap the code from the forum in its own method and return the determined token here. We have to compare this with the user’s input at the appropriate locations.
Please understand that I cannot show the whole code here. Unfortunately, I cannot host a demo application on https://apex.oracle.com because the package dbms_crypto is not available there.
So to set up the second factor, we create a secret and then store it with the user.
C_BASE32_CHARS  constant varchar2(32)   := 'ABCDEFGHIJKLMNOPQRSTUVWXYZ234567';

function generate_random_base32_string(length number) return varchar2 is
  l_random_string varchar2(32767);
begin
  for i in 1..length loop
    l_random_string := l_random_string ||
                       substr(C_BASE32_CHARS, 1 + floor(dbms_random.value(0, 32)), 1);
  end loop;

  return l_random_string;
end;
In order to make the whole process as simple as possible for the user, we offer him (1) a corresponding Authenticator App directly for installation.
 The user can then enter the generated secret (2) manually into the application or simply scan the QR code (3). This has a special structure (see code excerpt).
C_OTP_AUTH_LINK constant varchar2(1000) := 'otpauth://totp/%0?secret=%1&issuer=%2&algorithm=SHA1&digits=6&period=30';

function get_otpauth_link(p_secret  in varchar2,
                          p_name    in varchar2,
                          p_issuer  in varchar2,
                          p_prefix  in varchar2 default null)
                          return varchar2 is
  l_otp_auth_link varchar2(4000);
begin
  l_otp_auth_link := apex_string.format(p_message => C_OTP_AUTH_LINK,
                                        p0        => p_name,
                                        p1        => p_secret,
                                        p2        => p_issuer);

  return p_prefix || case when p_prefix is null then l_otp_auth_link
										 else apex_util.url_encode(l_otp_auth_link) end;
end;
The image, in my case an SVG image, of the QR code is created here with the package ZT_QR from the repo: https://github.com/zorantica/plsql-qr-code
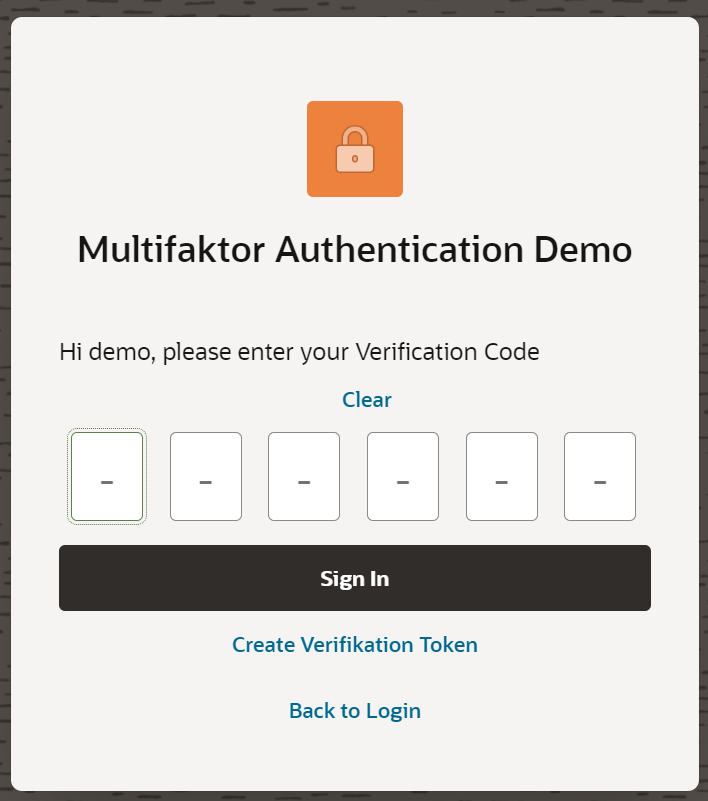
As soon as the user has scanned the QR code, a new entry for authentication is displayed in his Authenticator app. With the code displayed there, they can then confirm directly in the application (4) that the authentication works using the additional factor.
Here you can see what the process might look like.
The next step is then only to implement the additional factor in the login screen of the actual application. Here, the user name and the password must first be validated. Then the input fields for the token are displayed. Only after validation of this input does the actual login to the application become valid.
Featured image by Mahesh Patel from Pixabay


