The preferred way to use S3 for your static site content should be to use a CloudFront Distribution. For other options look at that blogpost.
Overview
CloudFront is Amazons Contend Delivery Network designed to serve your content as close to your customers as possible. To do that CloudFront provides a howl bunch of so called „Edge Locations“ that act as a cache for the content.
With a CloudFront Distribution it is possible to serve content from a private S3 Bucket and you can map every bucketname to our domain name with Route 53.
The picture shows how that solution works.

-
- A client requests the url.
- The request is routed to our CloudFront Distribution by Route 53
- If the requested Object can be served from the cache it will be delivered immediately by CloudFront.
* If the content is not cached. CloudFront uses a signed URL to request the Object.
** S3 returns the content to CloudFront
Signed URL´s: Signed URL´s can be used to access private Objects in S3 Buckets. These URL´s contains information to grant access to that resources.
Example
In my example i will provide a site under cognito-hosted-ui.marcobuss.de with content from the private bucket „aws-cognito-hosted-ui-159501877559“. The domain marcobuss.de is managed by Route 53, which makes some steps simpler. If your domain is not managed by Route 53 some additional steps will be required.
Create a Certificate
In the end for security reasons the site should only be accessible with https. To support that, a SSL certificate is required for the domain. For https you can select the CloudFront Certificates or use your own certificate. CloudFront provides his own certificates for https, if these certificate is used the browser will cause an error when accessing the site with your domain because the certificate is issued for the CloudFront domain not for your domain.

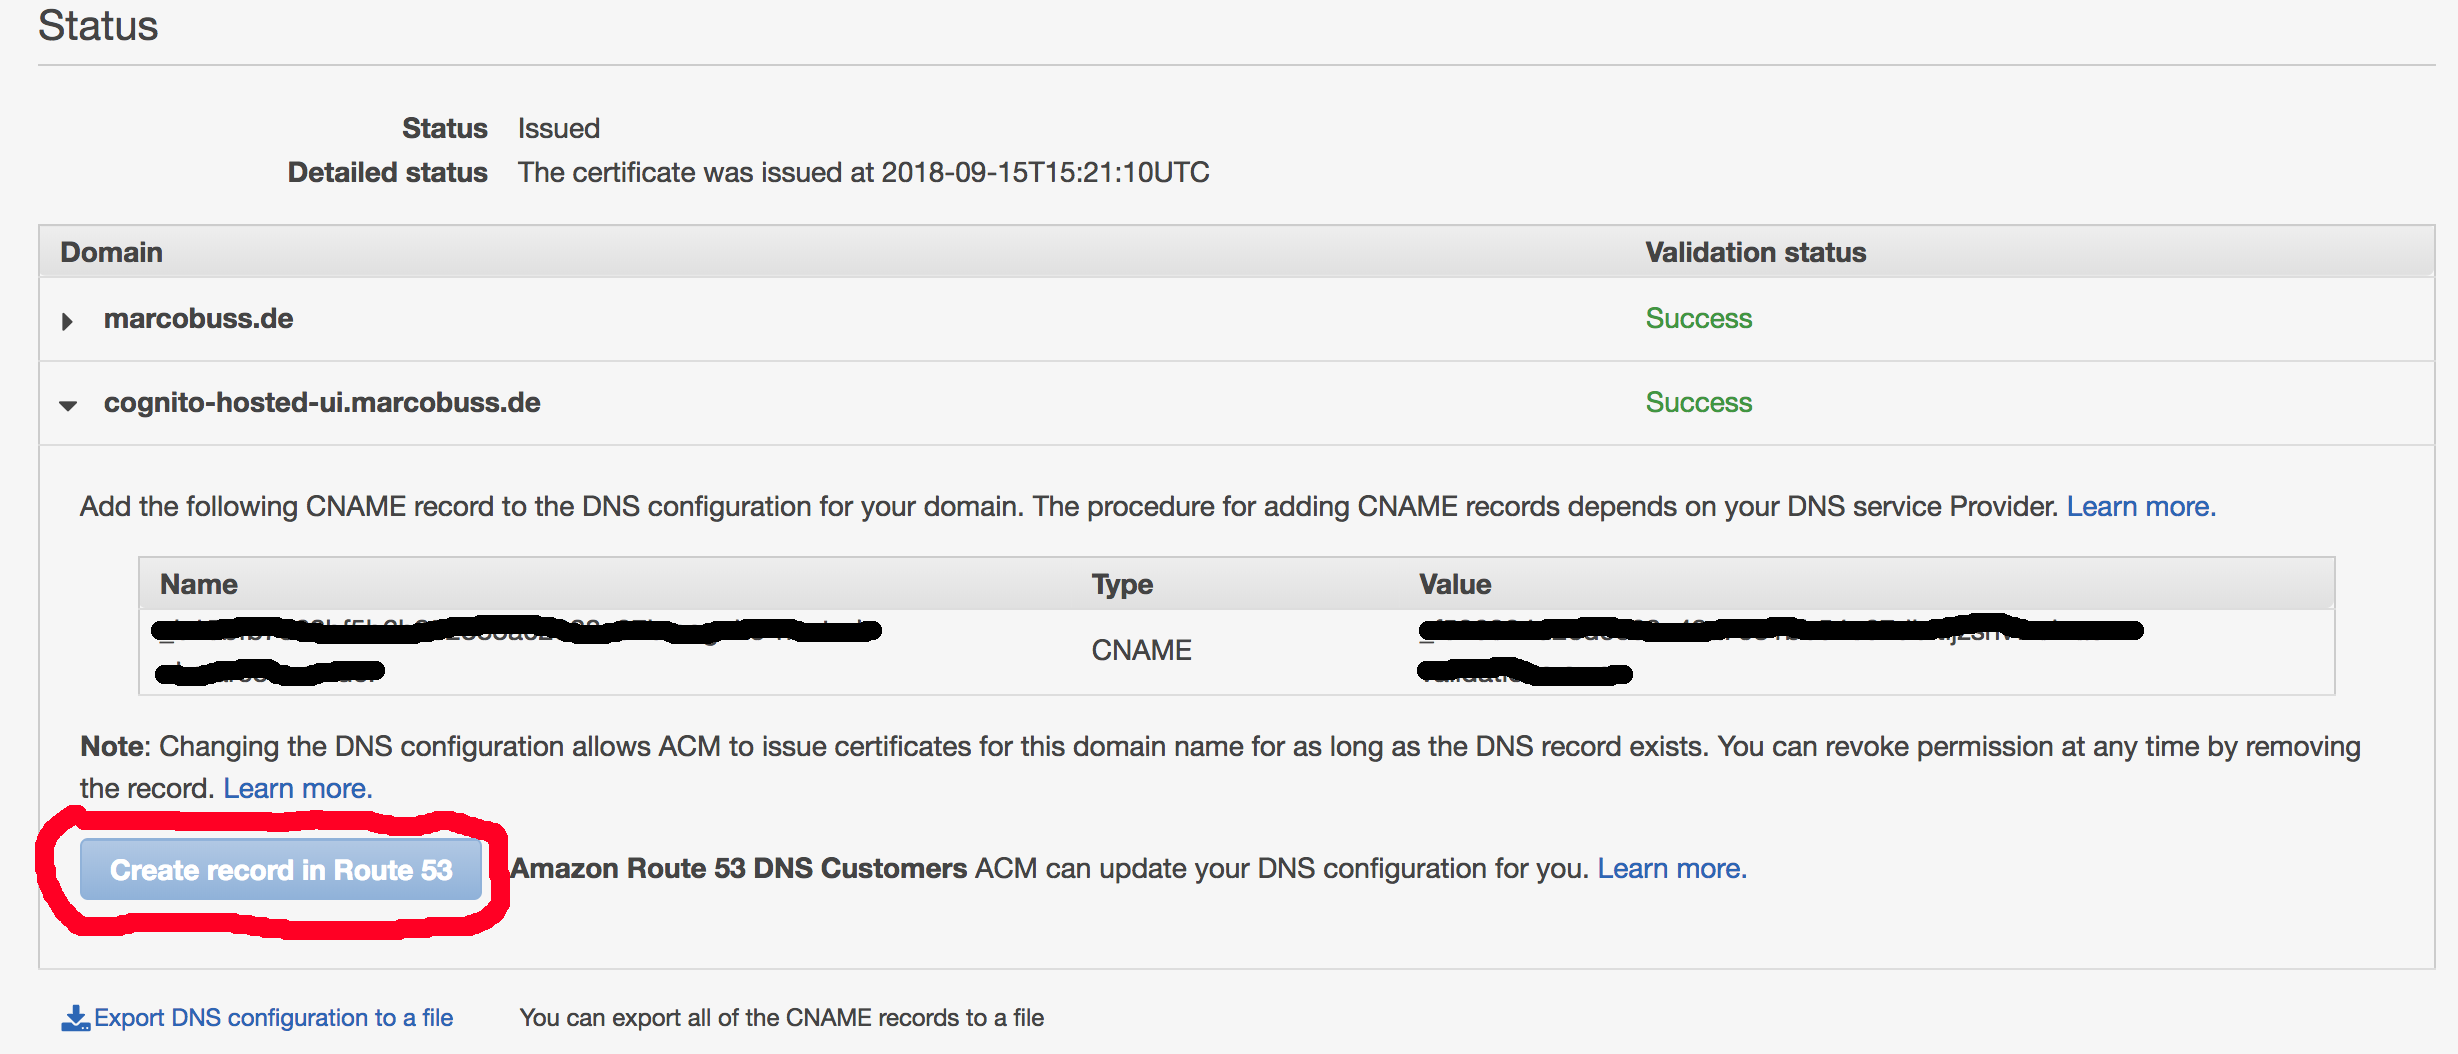
The certificate is managed by the AWS Certificate Manager. I also created my certificate here. It is really easy to get the certificate for your domain, it is even simpler if your domain is managed by Route 53 itself. The required DNS entries for the generate certificate can be inserted automatically for Route 53 managed domains. For all other domains you must create the required DNS entries so the certificate can be validated.

Create the CloudFront Distribution
After the certificate was successfully validated the CloudFront Distribution can be created. Go to the CloudFront Console and create a new Distribution.

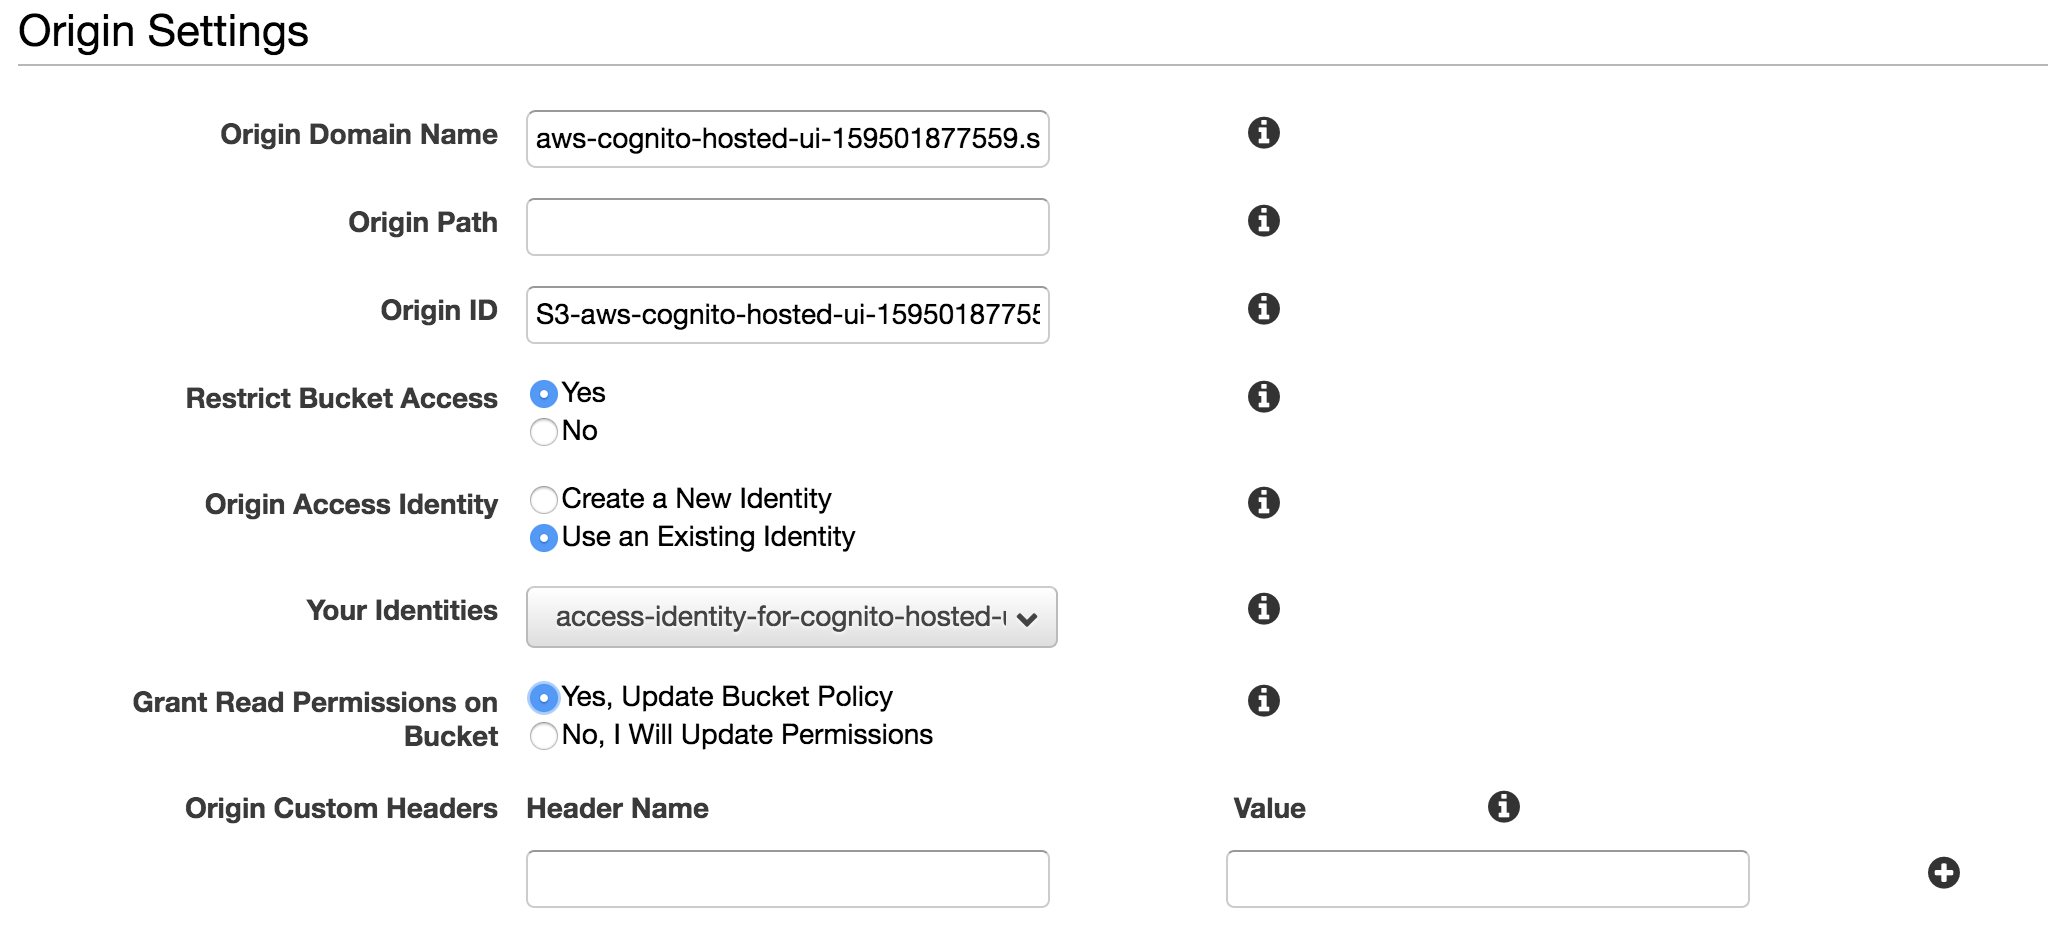
The first part are the Origin Settings. As „Origin Domain Name“ you must select your S3 Bucket, the „Origin ID“ is set automatically. To use a bucket that is complete private the „Restrict Bucket Access“ must be yes. CloudFront now uses signed URL´s for requesting new assets and you must use an existing identity or let CloudFront create a new one. CloudFront can update your bucket policy or you can do it by your own. I recommend the CloudFront option. The following policy was created for my bucket.
{
    "Version": "2008-10-17",
    "Id": "PolicyForCloudFrontPrivateContent",
    "Statement": [
        {
            "Sid": "1",
            "Effect": "Allow",
            "Principal": {
                "AWS": "arn:aws:iam::cloudfront:user/CloudFront Origin Access Identity EHYYXUMX6R0TJ"
            },
            "Action": "s3:GetObject",
            "Resource": "arn:aws:s3:::aws-cognito-hosted-ui-159501877559/*"
        }
    ]
}
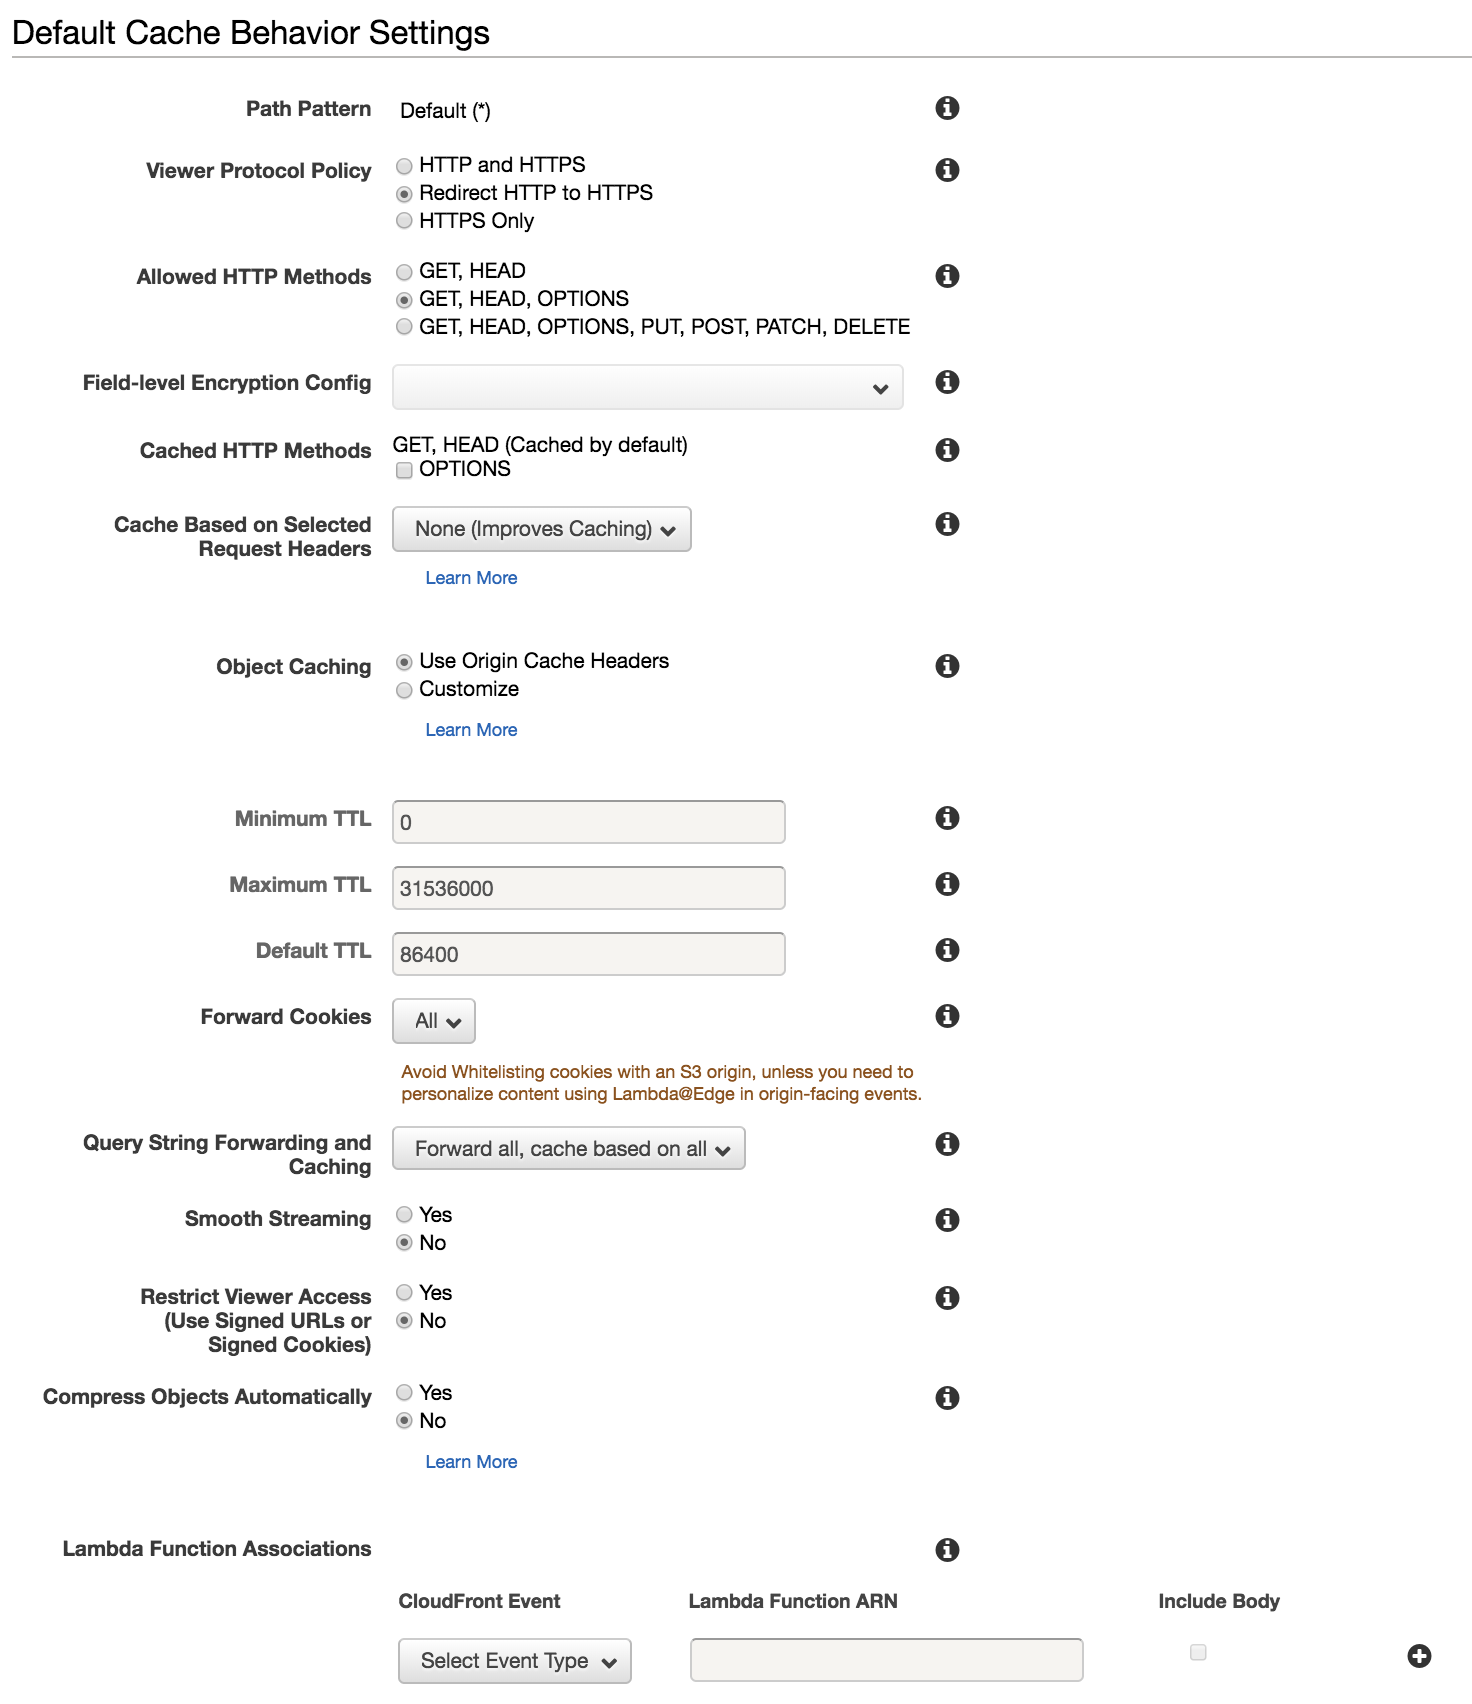
The next part configures some caching options. Just copy the configuration. As i wrote, the content is only accessible through https, so i defined that every http request is redirected to https. I have also configured that all Cookies and Query Strings must be forwarded.

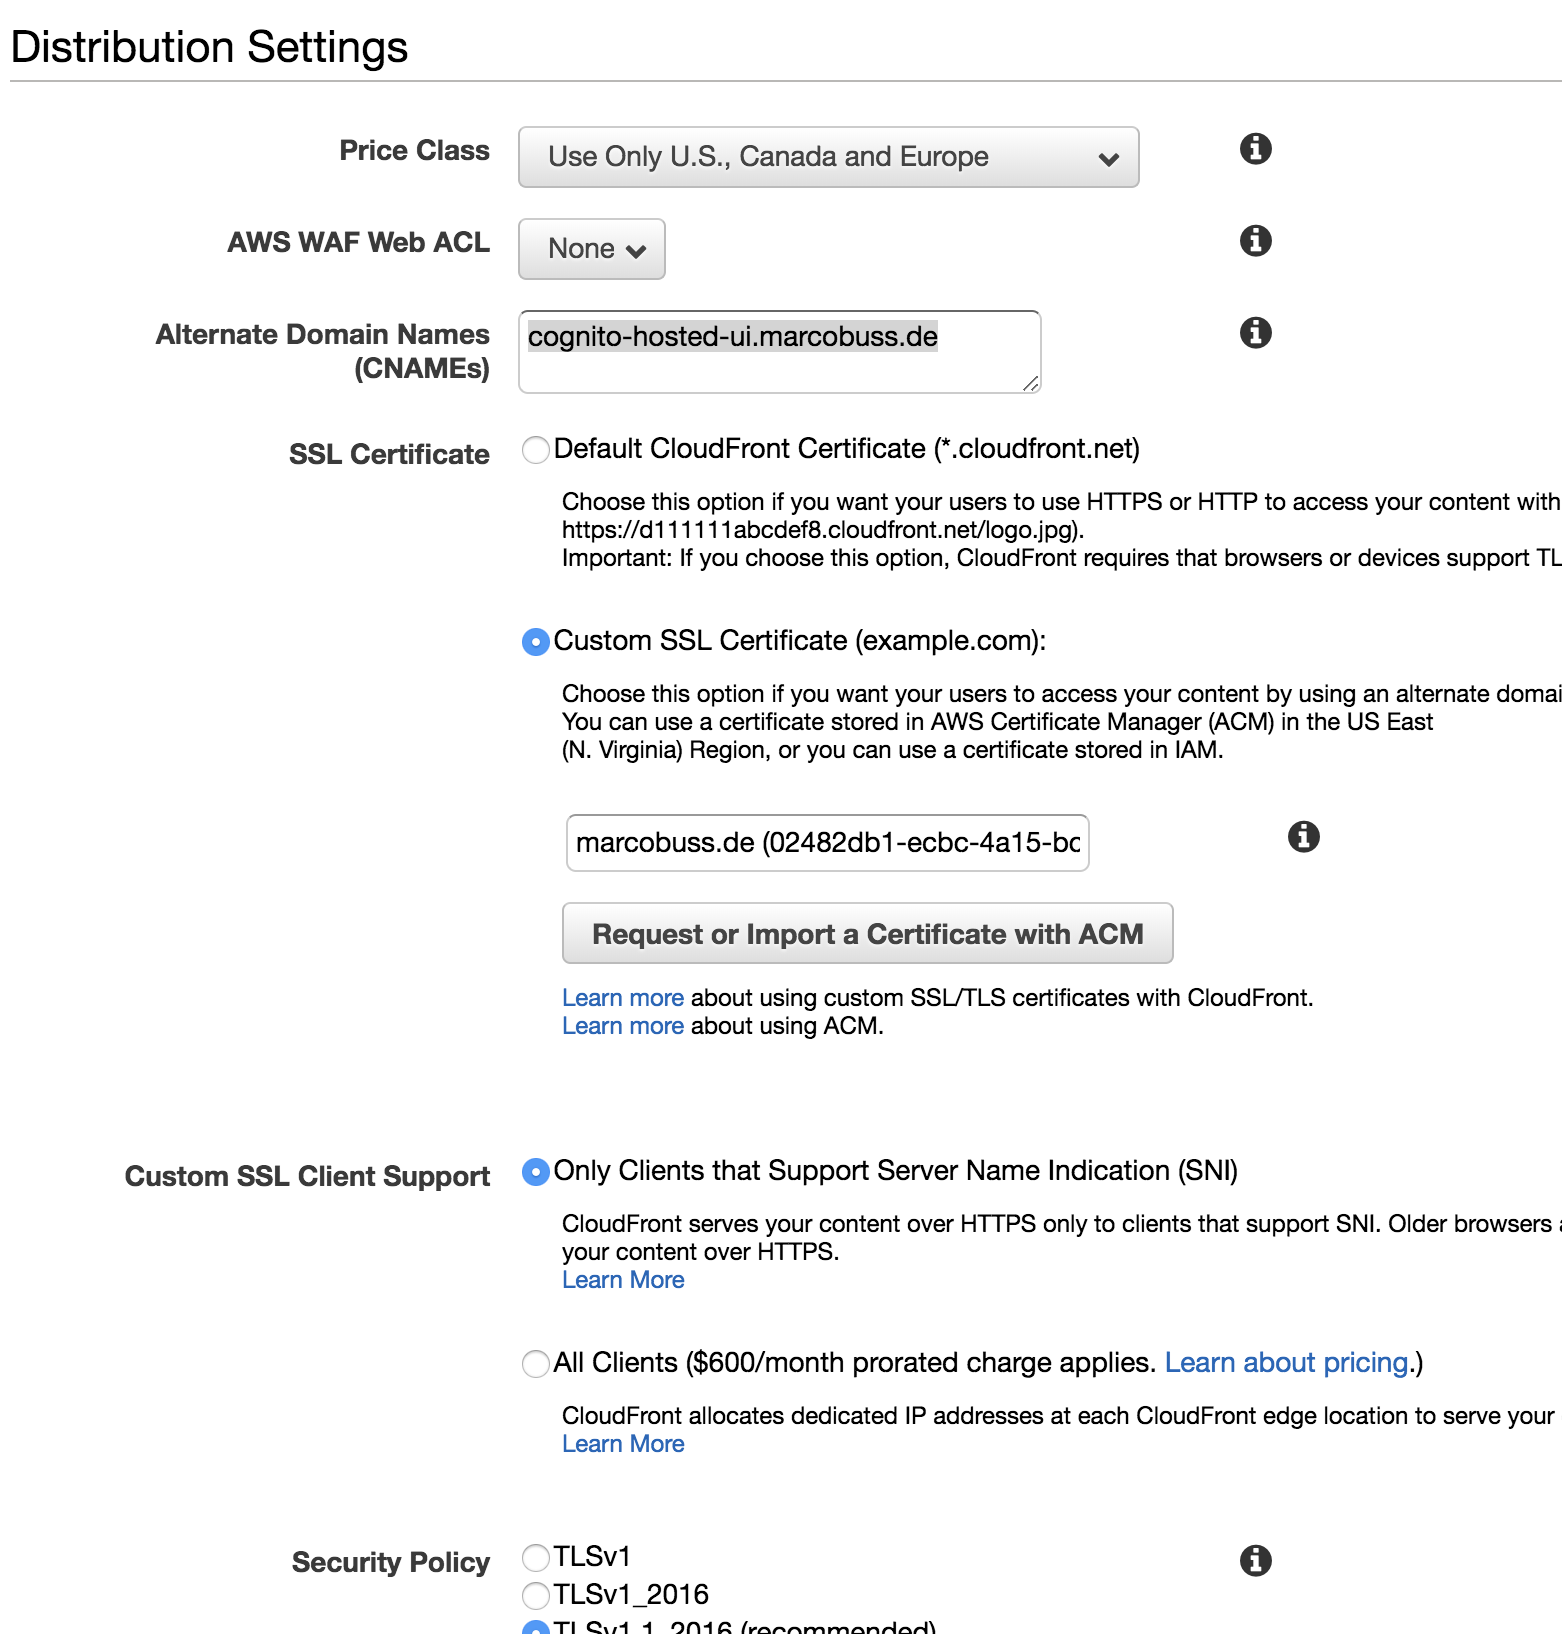
In the last part you can define some options about the distribution itself. For coast optimization i only use the U.S., Canada and Europe CloudFront Locations. I also must define the subdomain for the project as Alternate Domain Name and I must specify to use my previously created SSL Certificate. All other options i leave as default in this section.

After that, you can create your distribution. That takes aprox. 15 Minutes. After that time you have an CloudFront URL for your Distribution and your site is accessible through this url. For my Distribution the url is d2ssd8b2tt0m87.cloudfront.net
Create the Route 53 Alias
After creating the CloudFront Distribution you can configure a Route 53 Record Set. Go to your Hosted Zone for your domain and create a new Record Set.

Define your Record Set to be an „Alias“ and select the CloudFront Distribution from the Alias Target list. Wait some time, the list update is very slow. After the Record Set is saved, your S3 bucket is available under the url you defined.


2 Kommentare
Pingback: Use S3 to serve your Website – The Cattle Crew Blog
Pingback: How to solve the 404 HTTP Error for Angular Apps hosted on S3 – The Cattle Crew Blog