
Picking up my colleagues series about the Oracle IoT Cloud, it’s now time to show the core of the product. The API.
Using the UI is all good and well to learn the product, understand what it can do and what it can’t and how it works. But no system administrator wants to add 40.000 sensors one at a time and enter its serial number, vendor ID, manufacturer and Lat/Lon data by hand. This is where the REST API comes in. Sensors can be manufactured, their data digitally transferred from the manufacturer to the buyer and can then be automatically imported into the IoT Cloud using a given set of API’s.
Let’s first look at the general structure of the REST API.
The prerequisites
In order to be able to communicate with your IoT Clouds‘ REST API, you first need the following things:
- A REST Call tool. I would recommend POSTman for Chrome if you like a GUI, but of course you can always go cURL if you prefer a CLI.
- A username / password for the IoT Cloud.
- a registered device to have an endpoint to talk to
- [a OAuth2 Authorization Token. I will get to this later]
A first call
Since everyones URL for their IoT Cloud will be different, I will only specify the URN part of the request. To see the conventions on the Oracle IoT Clouds URL structure, check the API docs.
Let’s consider the following device in our system:
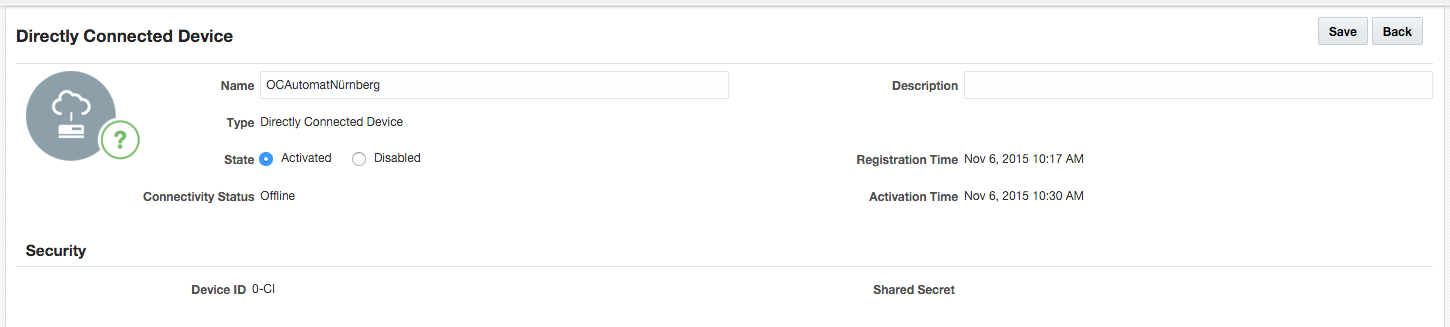
In order to call the IoT Cloud and ask it for information regarding this device we use the following call:
GET https://
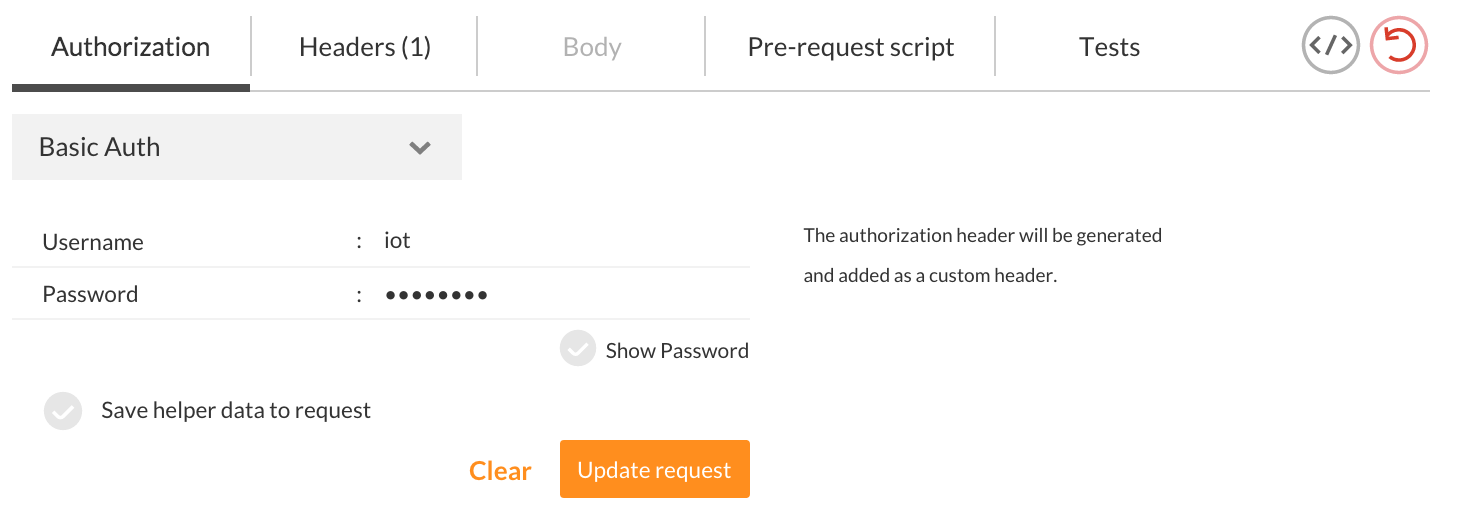
Note that we also added authorization to the request, using a Basic authentication.
This is our response: (note that our URL’s are different because we have manipulated our hosts file pointing to a specific IP with „iotserver“. This is due to the fact that we were working with our own instance of the cloud in the closed beta we participated in.)
{
 "enabled":true,
 "resources":{
 "links":[
 {
 "rel":"canonical",
 "href":"https://iotserver:7102/iot/api/v1/endpoints/0-CI/resources"
 }
 ]
 },
 "connectivityStatus":"OFFLINE",
 "softwareRevision":"",
 "hardwareRevision":"",
 "state":"ACTIVATED",
 "serialNumber":"123",
 "children":{
 "links":[
 {
 "rel":"canonical",
 "href":"https://iotserver:7102/iot/api/v1/endpoints/0-CI/children"
 }
 ]
 },
 "type":"DIRECTLY_CONNECTED_DEVICE",
 "id":"0-CI",
 "oui":0,
 "created":"2015-11-06T09:17:32Z",
 "activationTime":"2015-11-06T09:30:14Z",
 "description":"",
 "manufacturer":"OC",
 "configurations":{
 "links":[
 {
 "rel":"canonical",
 "href":"https://iotserver:7102/iot/api/v1/endpoints/0-CI/configurations"
 }
 ]
 },
 "endpointName":"OCAutomatNürnberg",
 "deviceUID":"0-CI-OC-ABC-123",
 "modelNumber":"ABC",
 "sharedSecret":"",
 "metadata":{
 "links":[
 {
 "rel":"canonical",
 "href":"https://iotserver:7102/iot/api/v1/endpoints/0-CI/metadata"
 },
 {
 "rel":"self",
 "href":"https://iotserver:7102/iot/api/v1/endpoints/0-CI/metadata"
 }
 ]
 },
 "links":[
 {
 "rel":"canonical",
 "href":"https://iotserver:7102/iot/api/v1/endpoints/0-CI"
 },
 {
 "rel":"self",
 "href":"https://iotserver:7102/iot/api/v1/endpoints/0-CI"
 },
 {
 "rel":"endpoints",
 "href":"https://iotserver:7102/iot/api/v1/endpoints"
 }
 ]
}
As you can see in the response, there is already a bunch of information included in the response with links to further possible interactions. This is a HATEOS type response, meaning in various responses, a client always receives links to additional information, rather than having to hard-code or provide special-case handling of responses to construct subsequent links.
Calling a device resource
If you continue to call e.g. the /iot/api/v1/endpoints/0-CI/resources endpoint, you’ll receive data about the resources, the device exposes to the cloud. In this context resources are things, the thing can do. This Endpoint doesn’t return anything, unless the client code includes resources that it exposes to the cloud. If you update the client code and add further resources, the list will grow. Our device exposes one such resource that we call „onlinesale“. If someone buys something online, this resource takes a POST message ordering the device to release the purchased product.
{
 "methods":[
 "POST"
 ],
 "id":"0-AU",
 "description":"onlineSale",
 "endpointId":"0-CI",
 "url":"onlinesale",
 "links":[
 {
 "rel":"canonical",
 "href":"https://iotserver:7102/iot/api/v1/endpoints/0-CI/resources/onlinesale"
 }
 ]
 }
As you can see, the returned data gives an address that describes the URI to the resource as well as the HTTP method but it doesn’t provide a description on how the message needs to be structured to be understood by the client. So for now, this has do be well documented, e.g. in the client code documentation.
If you send a data message to the specified resource, a confirmation message is received. Since the IoT Cloud acts like a message broker, it only accepts the incoming message and returns a confirmation without waiting for the message to be actually transmitted. However, it includes an ID for the request as well as a URI to check the transmission state.
{
 "id": "5cfdcba7-9c26-4bd5-9388-0dfb939a0f76",
 "requestTime": "2015-12-14T10:21:10Z",
 "status": "RECEIVED",
 "method": "POST",
 "endpointId": "0-CI",
 "url": "onlinesale",
 "links": [
 {
 "rel": "canonical",
 "href": "https://iotserver:7102/iot/api/v1/endpoints/0-CI/resources/onlinesale"
 },
 {
 "rel": "self",
 "href": "https://iotserver:7102/iot/api/v1/endpoints/0-CI/resources/onlinesale"
 },
 {
 "rel": "endpoints",
 "href": "https://iotserver:7102/iot/api/v1/endpoints"
 },
 {
 "rel": "requests",
 "href": "https://iotserver:7102/iot/api/v1/endpoints/requests/5cfdcba7-9c26-4bd5-9388-0dfb939a0f76"
 }
 ]
}
Your application can use this endpoint to keep checking for a successful delivery of the message and, if necessary, take action if the message isn’t delivered in the desired time.
Registering a new device using the API
If you want to register a device, or many devices at once, there is an API endpoint for this. It requires you to transmit a CSV file containing all the data needed for the devices.
A row in the CSV could look like this:
test_device_0,GDVC,test_manufacturer,ModelNo_device_0,SerialNo_device_0,DeviceUID_device_0,,Key1,Value1,Key2,Value2
And the response by the IoT Cloud looks like this
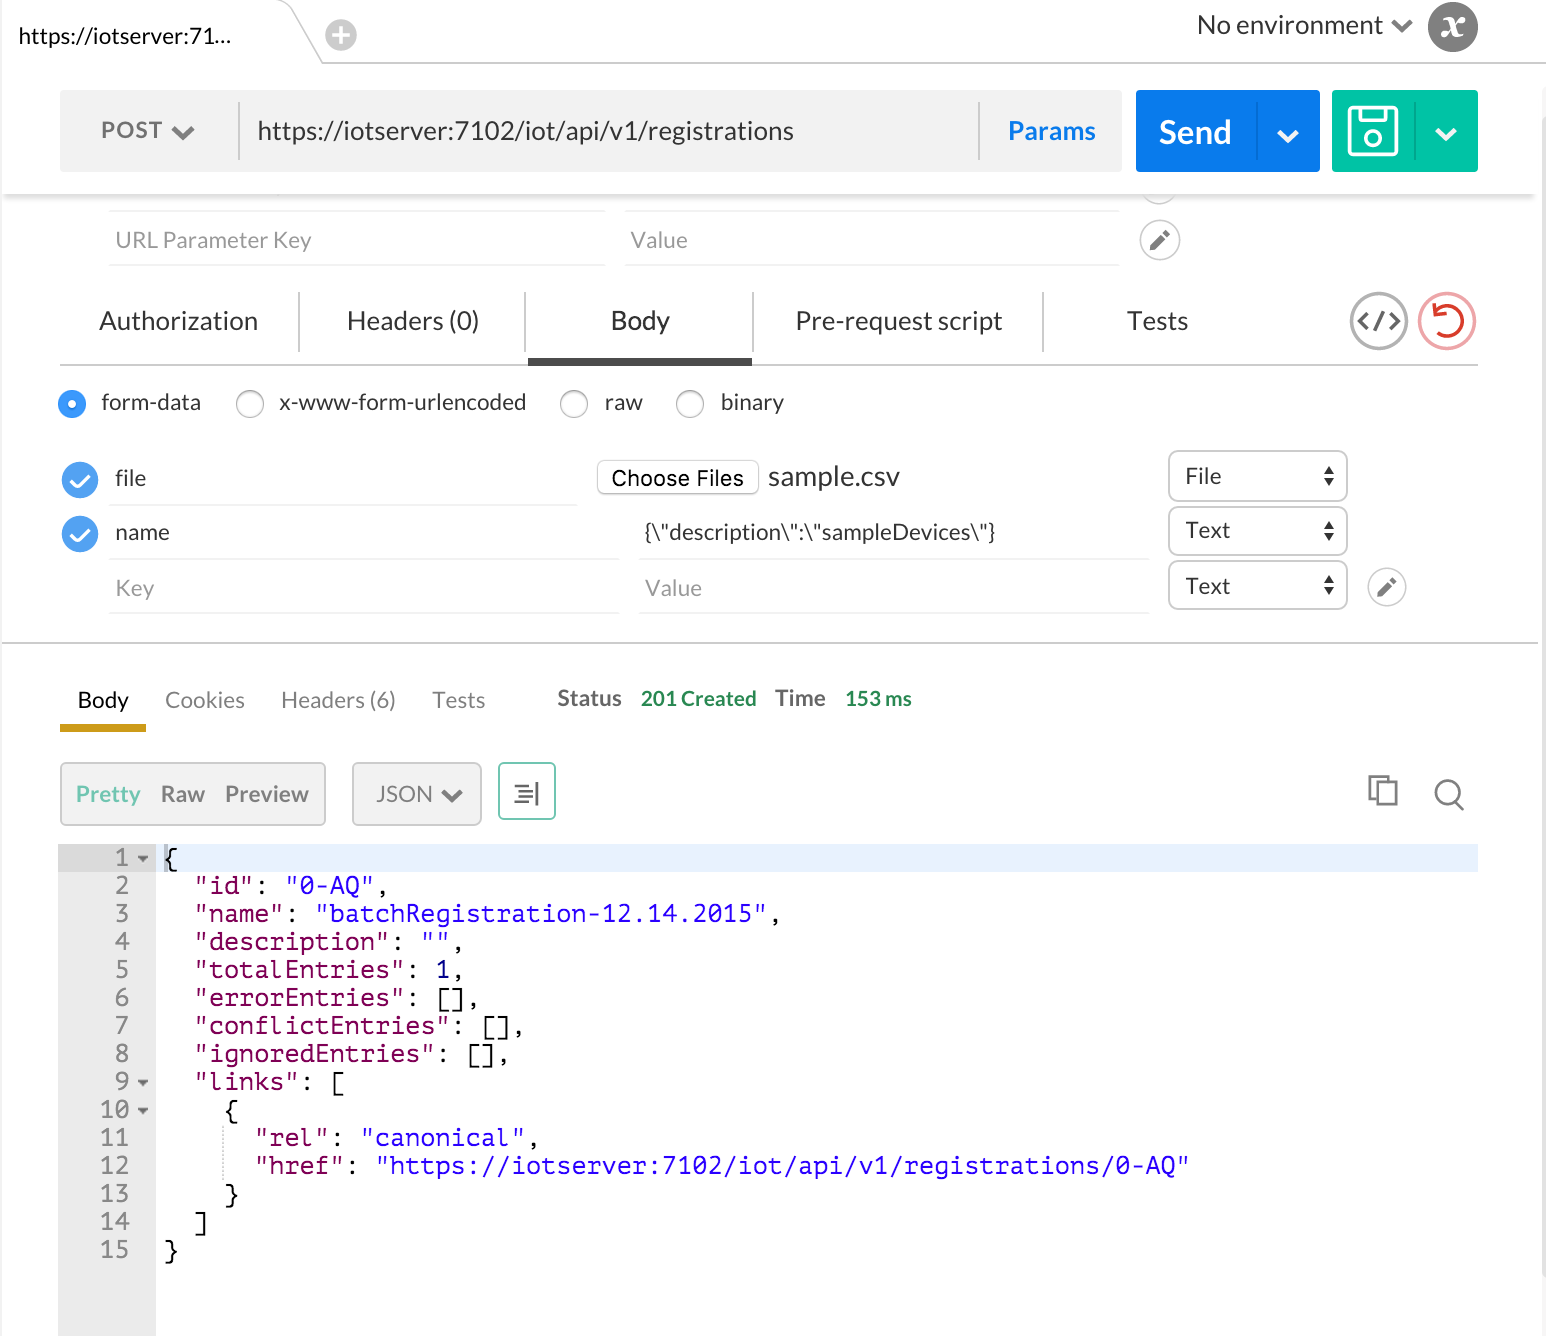
This causes the cloud to have taken in the data but another call is needed to actually have it register the devices. Perform a POST on the URI provided in the response and in the Body of the request, declare the conflictResolution strategy. It can be either of 5 possible ways described in the API docs.
Once the POST call has been succesfull, a new device has been added to the cloud (row 4)

There are many more options in the API. You can CRUD on enterprise endpoints, read metrics of your IoT Cloud instance, add software artifacts for your devices to support a OTA software update process etc.
In a couple of days we’ll describe the essentials to connect an actual Java client to the cloud, so again: Stay tuned!


2 Kommentare
Pingback: Introducing the Oracle IoT Cloud – Part III: Analysing data | The Cattle Crew Blog
Pingback: Introducing the Oracle IoT Cloud – Part V: Forwarding data to external systems | The Cattle Crew Blog