
In my last projects I had to generate a CSV file out of some data in the OSB (Oracle Service Bus) and upload it on a ftp server. The requirement was to realize it with the Oracle Service Bus 12c. This article describes a way to generate a CSV file and store it. As precondition you should have a WSDL-file (with XSD schema) which describes the remote data source and at least a example CSV file, to specify the result.
Generate FTP adapter on Weblogic Server (WLS)
In the first step we generate the ftp adapter on the WLS. Therefore start your WLS and open the admin console. Switch to the Outbound Connection Pools via Deployments > FtpAdapter > Configuration > Outbound Connection Pools and press new for the generation of the ftp adapter. Then select the ConnectionFactory and click next. Now we“™ve to define the JNDI name, for example eis/Ftp/test. Press finish and the creation of ftp adapter processes.
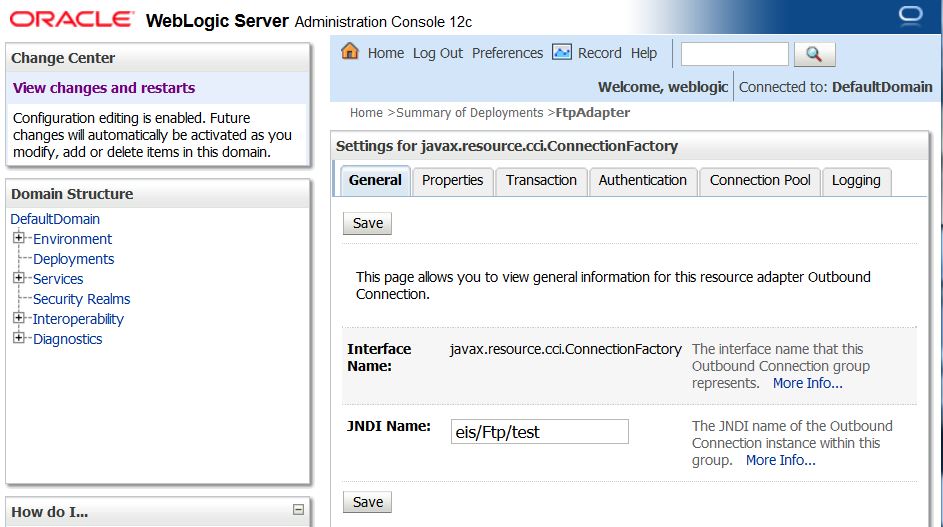
The configuration of the adapter is some kind of standard, that’s why we“™ve to adapt the username, password and the host at this point. So we select the generated adapter in Outbound Connection Pools and are able to adapt the preferences.
Hint: After filling in the credentials/host you should immediatly push enter. Otherwise it could be possible that changes has not been taken. Then press the save button.
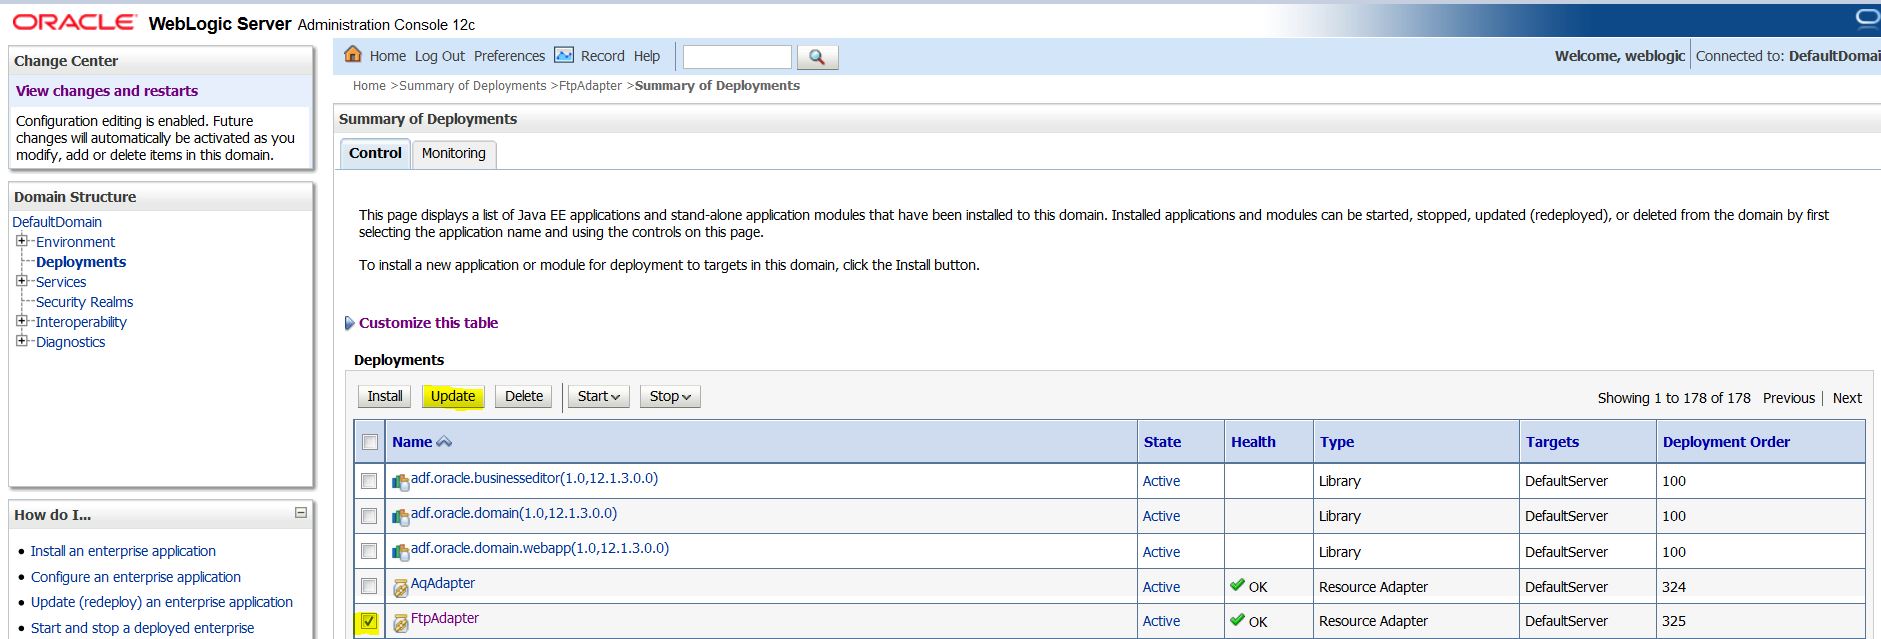
Now we have to make the changes valid. Open the Deployments, put a hook in the box of FtpAdapter and then press the Update button. The FTP adapter has been created and we can start implementing the CSV file creation.
Generate schema (XSD) for the CSV file
Now we“™ve to import the WSDL and its XSD file into our existing service bus project. (I“™m not going to explain how to create the application and the service bus project at this point. Please read further tutorials if you“™re starting from scratch.)
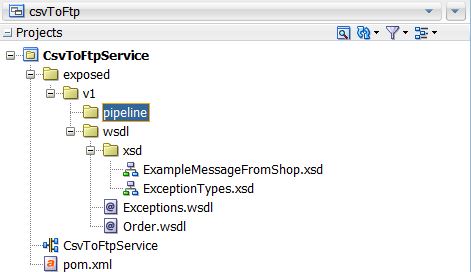
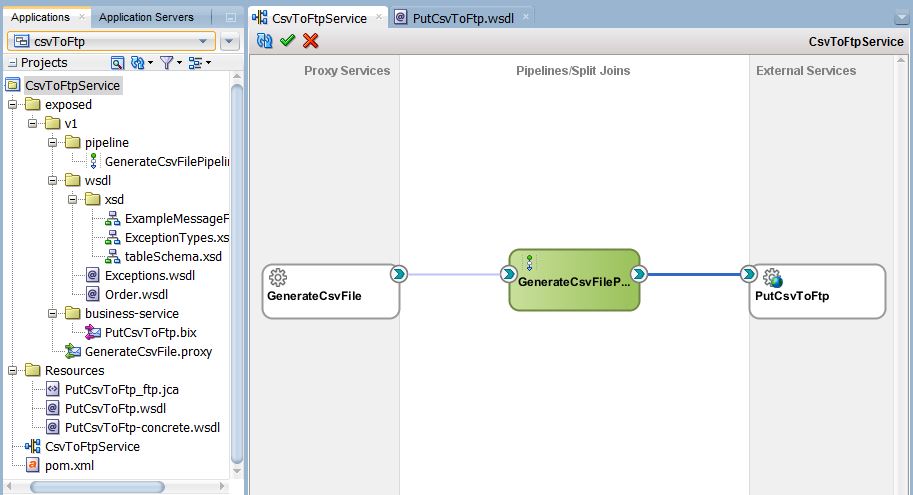
See the next screenshot to get in touch with the folder structure that we use in the next steps. „” We“™ve generated the proxy service with the WSDL Order and the related pipeline already.
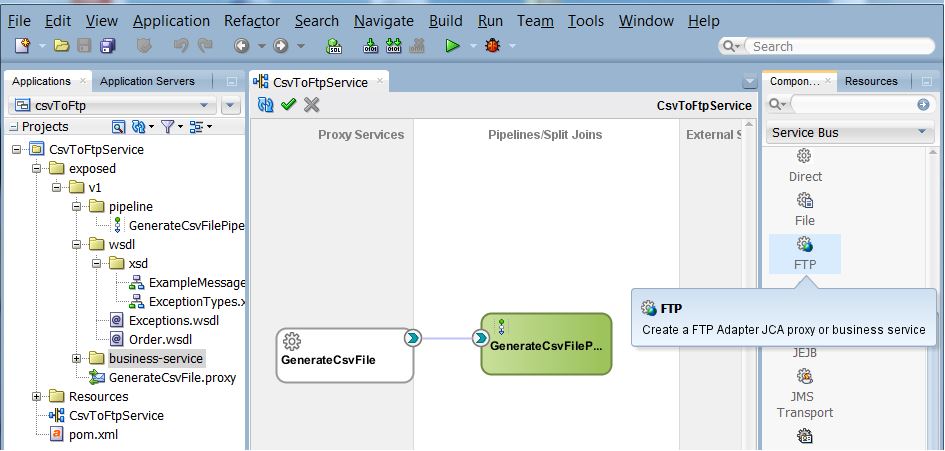
Next we create the ftp adapter as a business service. In External Services drag in FTP (Component > Technology)
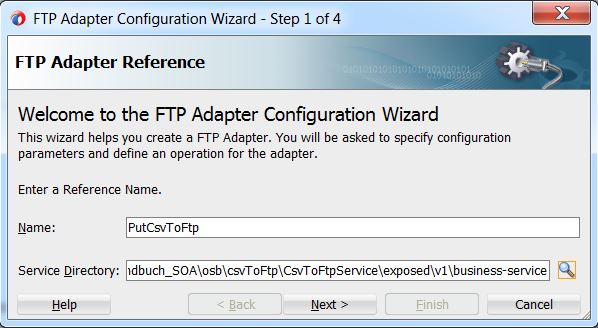
Enter the desired name of the FTP Adapter. In this example we use PutCsvToFtp as the reference name.
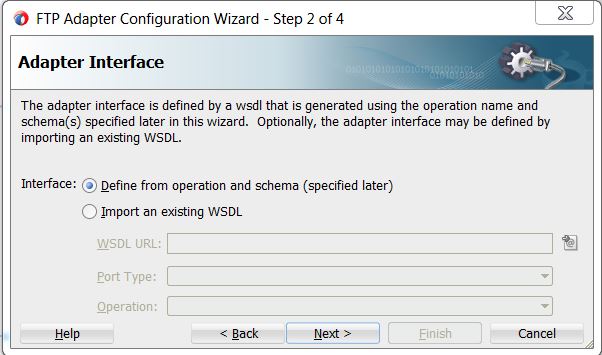
We don’t have a schema for the Adapter Interface yet, but the CSV example file. That’s why Define from operation and schema (specified later) is selected now.
In step 3 of 4 fill in the JNDI name of the FTP adapter on the WLS we“™ve created before (see above) „” in this example it is eis/Ftp/test.
Click next. Yes, it is somehow confusing but now we are in step 4 of 7 😉
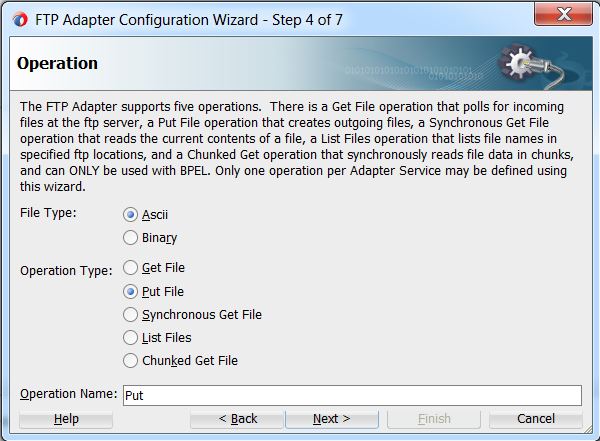
We“™ve to choose the operation of the FTP adapter. The file type of a CSV file is ASCII and for the operation type we select Put File, because we want to put (oracle slang for upload) our text-based file to the ftp server:
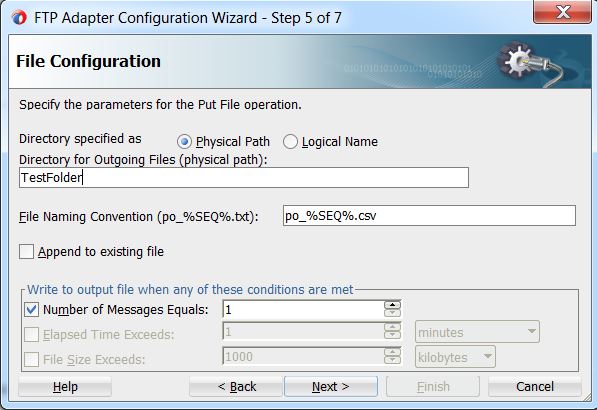
The upload directory is defined in the next step and should be entered in the Physical Path input field. We name it TestFolder. If the directory doesn“™t exist it“™ll be created upon upload. Here you can fill in a path, where the folder is located, but I choose it simple and let the folder be on the root directly. The File Naming Convention is not relevant for us, because we will overwrite it in our pipeline with a generic filename later.
Now it’s time to build the XSD schema for the CSV file. Press the gearwheel and a wizard for NXSD will open. Fill in the file name (in this example it is tableSchema) and the directory where it should be stored. Click next, select Delimited and click again next. Then we need to define the File Description. At first we specify the example. That means, open the example csv. Here the exampleCsv.csv has the following content:
 "order_number", "reclamation_type", "reclamation_reason"
 "cde158749635","204","M54"
 "cfm245756325","200","Z21"
If the content of the CSV file is correct and valid it will look like this:

If the preview window shows crazy stuff, then your CSV file is not correct (like different number of commas in the single lines or something like this).
We decide whether our file contains only one record ore multiple records as we choose it in this example: Multiple records are of single type
In step 5 of 8 the namespace is set to http://com.opitz-consulting/PutCsvToFtp, the root-element gets the name Order and the record-element should be named OrderElement.
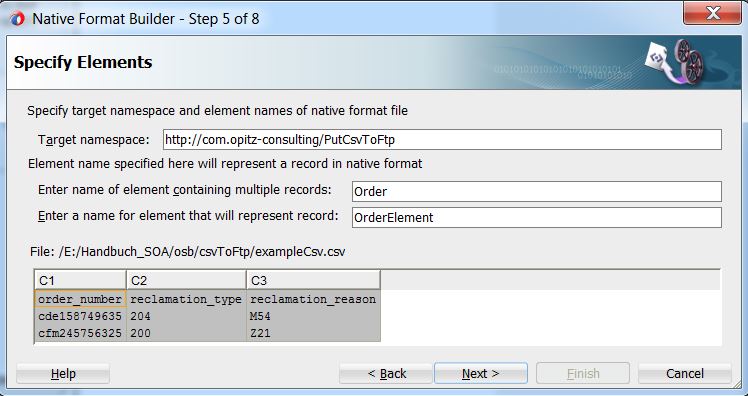
After this configurations we specify the delimiters. This is easy to choose: Our values are delimited by comma and the record by eol (End of Line).
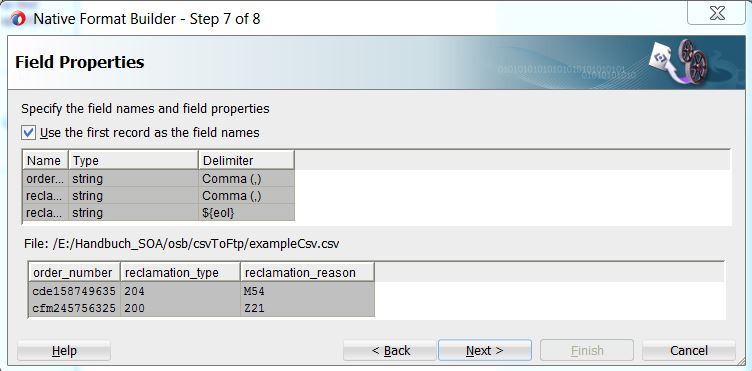
If the first Row should be used as XSD tags, select the checkbox. This does not mean that it will generate a header in the CSV file automatically. It just names the fields in the XSD like the entries in the first record. This is a good option, because it’s easier to map the fields from the incoming order-element to this XSD file later.
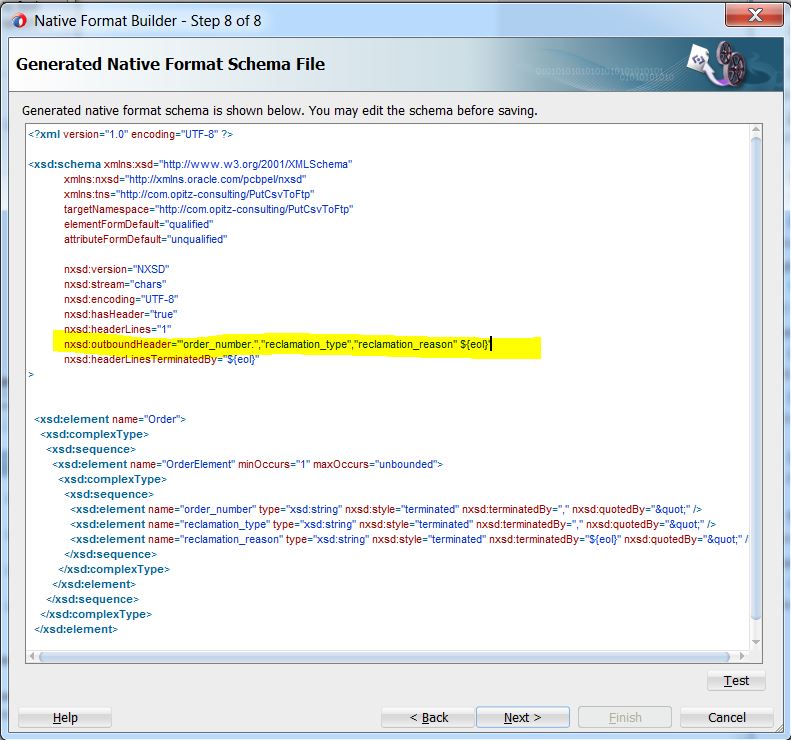
The configuration for the XSD-generation is nearly finished. Just one last eye on the generated native format schema file. And you can see, there is no header. But we want a header, so we need to put nxsd:outboundHeader after nxsd:headerLines=“1″. Like in our example nxsd:outboundHeader='“order_number.“,“reclamation_type“,“reclamation_reason“ ${eol}‘ :
Click next and finish and the XSD-file is generated.
The JDeveloper jumps back to the FTP Adapter Configuration Wizard automatically and now the URL to our new schema file is set:

Again press next and finish and the FTP Business Service will be created. Its files are stored in the folder resources. Maybe you need to change the path to the tableSchema.xsd in the PutCsvToFtp.wsdl. Then everything should be green and the pipeline can be wired with the FTP Adapter.
Transform incoming data to CSV format and change filename of the CSV file
Now it’s time to map the incoming data (order-element) to our CSV file. This will be done by a XQuery transformation. But before we want to change the filename of the CSV file. The filename should be concatenated with an „order_“ and the ordernumber from the incoming order-element.
At first we add an Assign to the Request Action. The name of the variable is ftpFilename and the Value is concat(‚order_‘,$body/v1:orderUpdateMessage/v1:update/v1:base_data/v1:order/@order_number,‘.csv‘). This concats the order_ with the specific order_number of the order-element. In our exmple the filename would be something like this order_cde158749635.csv

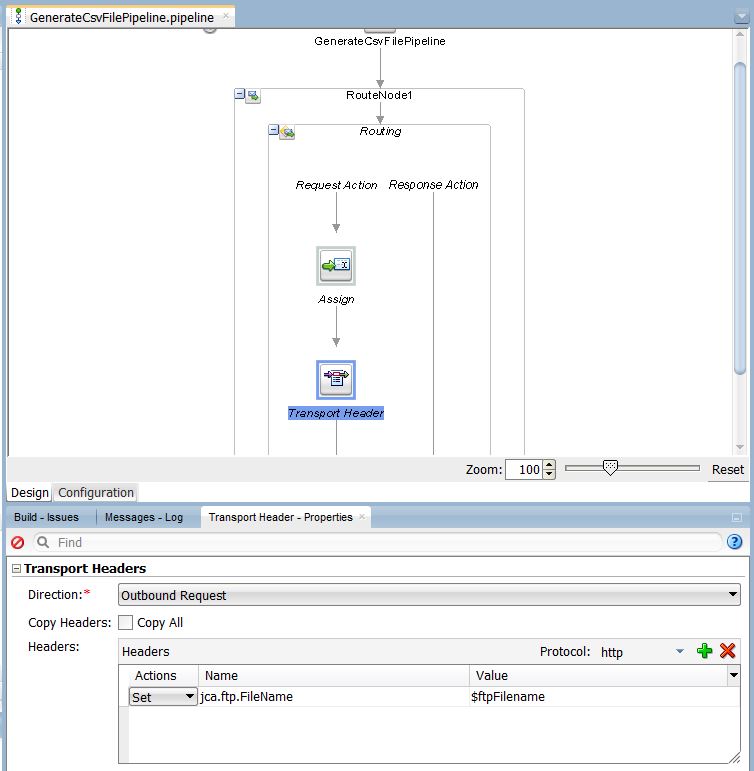
We add a Transport Header after the Assign and select Outbound Request as Direction. In the Headers section we select ftp as Protocol and press the plus button for adding a new row. In this row the Action is Set. The Name has to be jca.ftp.FileName and the Value is our variable $ftpFilename. With this transport header properties, the filename will be replaced with the correct generic input.
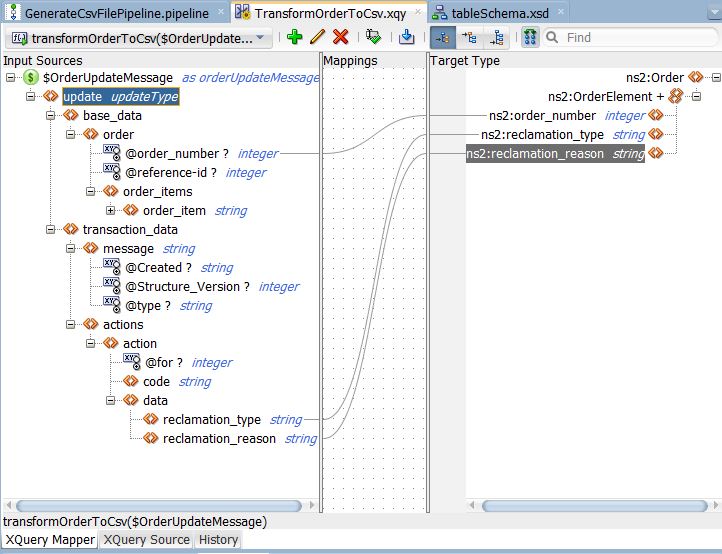
After this we need to create a XQuery Transformation with the name TransformOrderToCsv. As Sources we select the message from the incoming Order.xsd from the proxy service. The Target is the Order (the root element) of the tableSchema.xsd from the FTP Adapter Business Service (see above). Generate the XQuery and map the corresponding values:
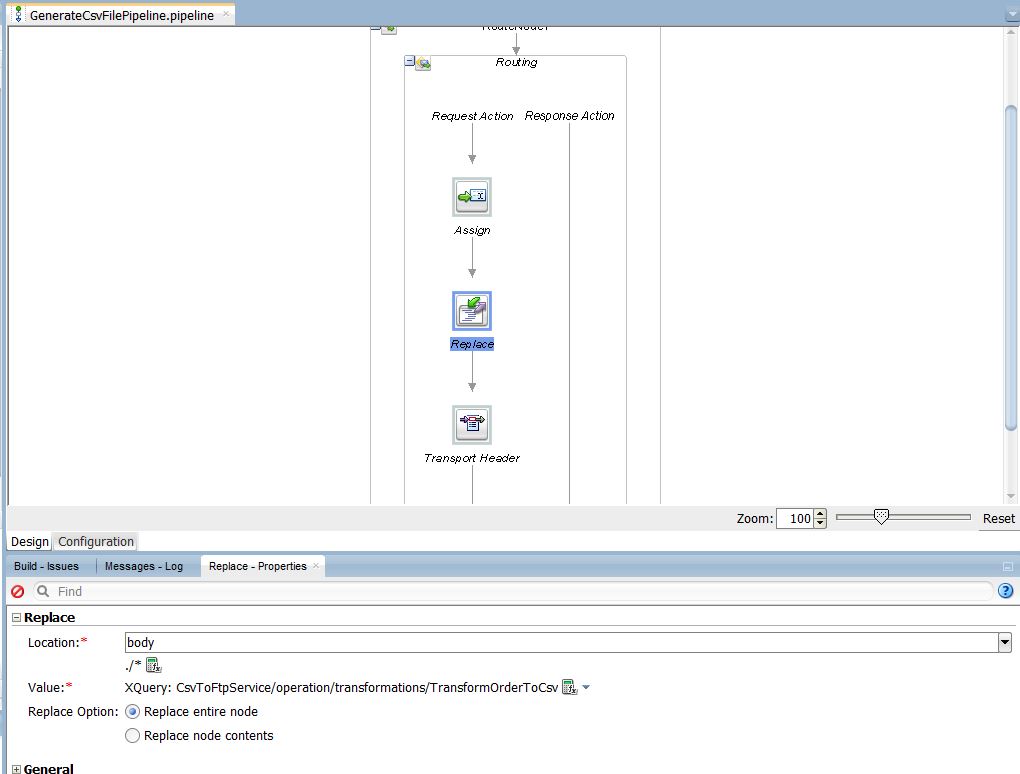
Last step: Add a Replace between the Assign and the Transport Header. The Location is body ./* and the value is the TransformOrderToCsv XQuery. Now the binding needs to be filled. As the XQuery expects the message from the incoming order-element, we will choose it from the body.
After deploying the application it will create CSV files and store them to the ftp server.
Have fun 🙂
")
1 Kommentar
danke, es hilft mir sehr