
This prototype started off as a personal project. So it’s not a big surprise why the 433mhz plugs were chosen as a first tech. They are in every household and I wanted to retrofit what was already there to become a bit smarter. Being able to group, manage and remotely control these plugs is an idea many have had before and there are several ways of controlling these out there.
But while these primitive plugs are maybe not the most elegant way of controling things, they are still just what they are. Primitive things that are a great way to learn how things look, once you leave the ground of TCP based error corrected communication over the web and step into the real world with all its different environments. No automatic error correction, just plain old radio signals. So if I wanted to keep track of which lights are on and which are off, I needed to make sure the plugs will receive my message. I read a bit about radio signal strengths and its limits set up by the government. The 433mhz emitters are cheap, but thats also why they can be problematic. But there turned out to be a really easy fix: 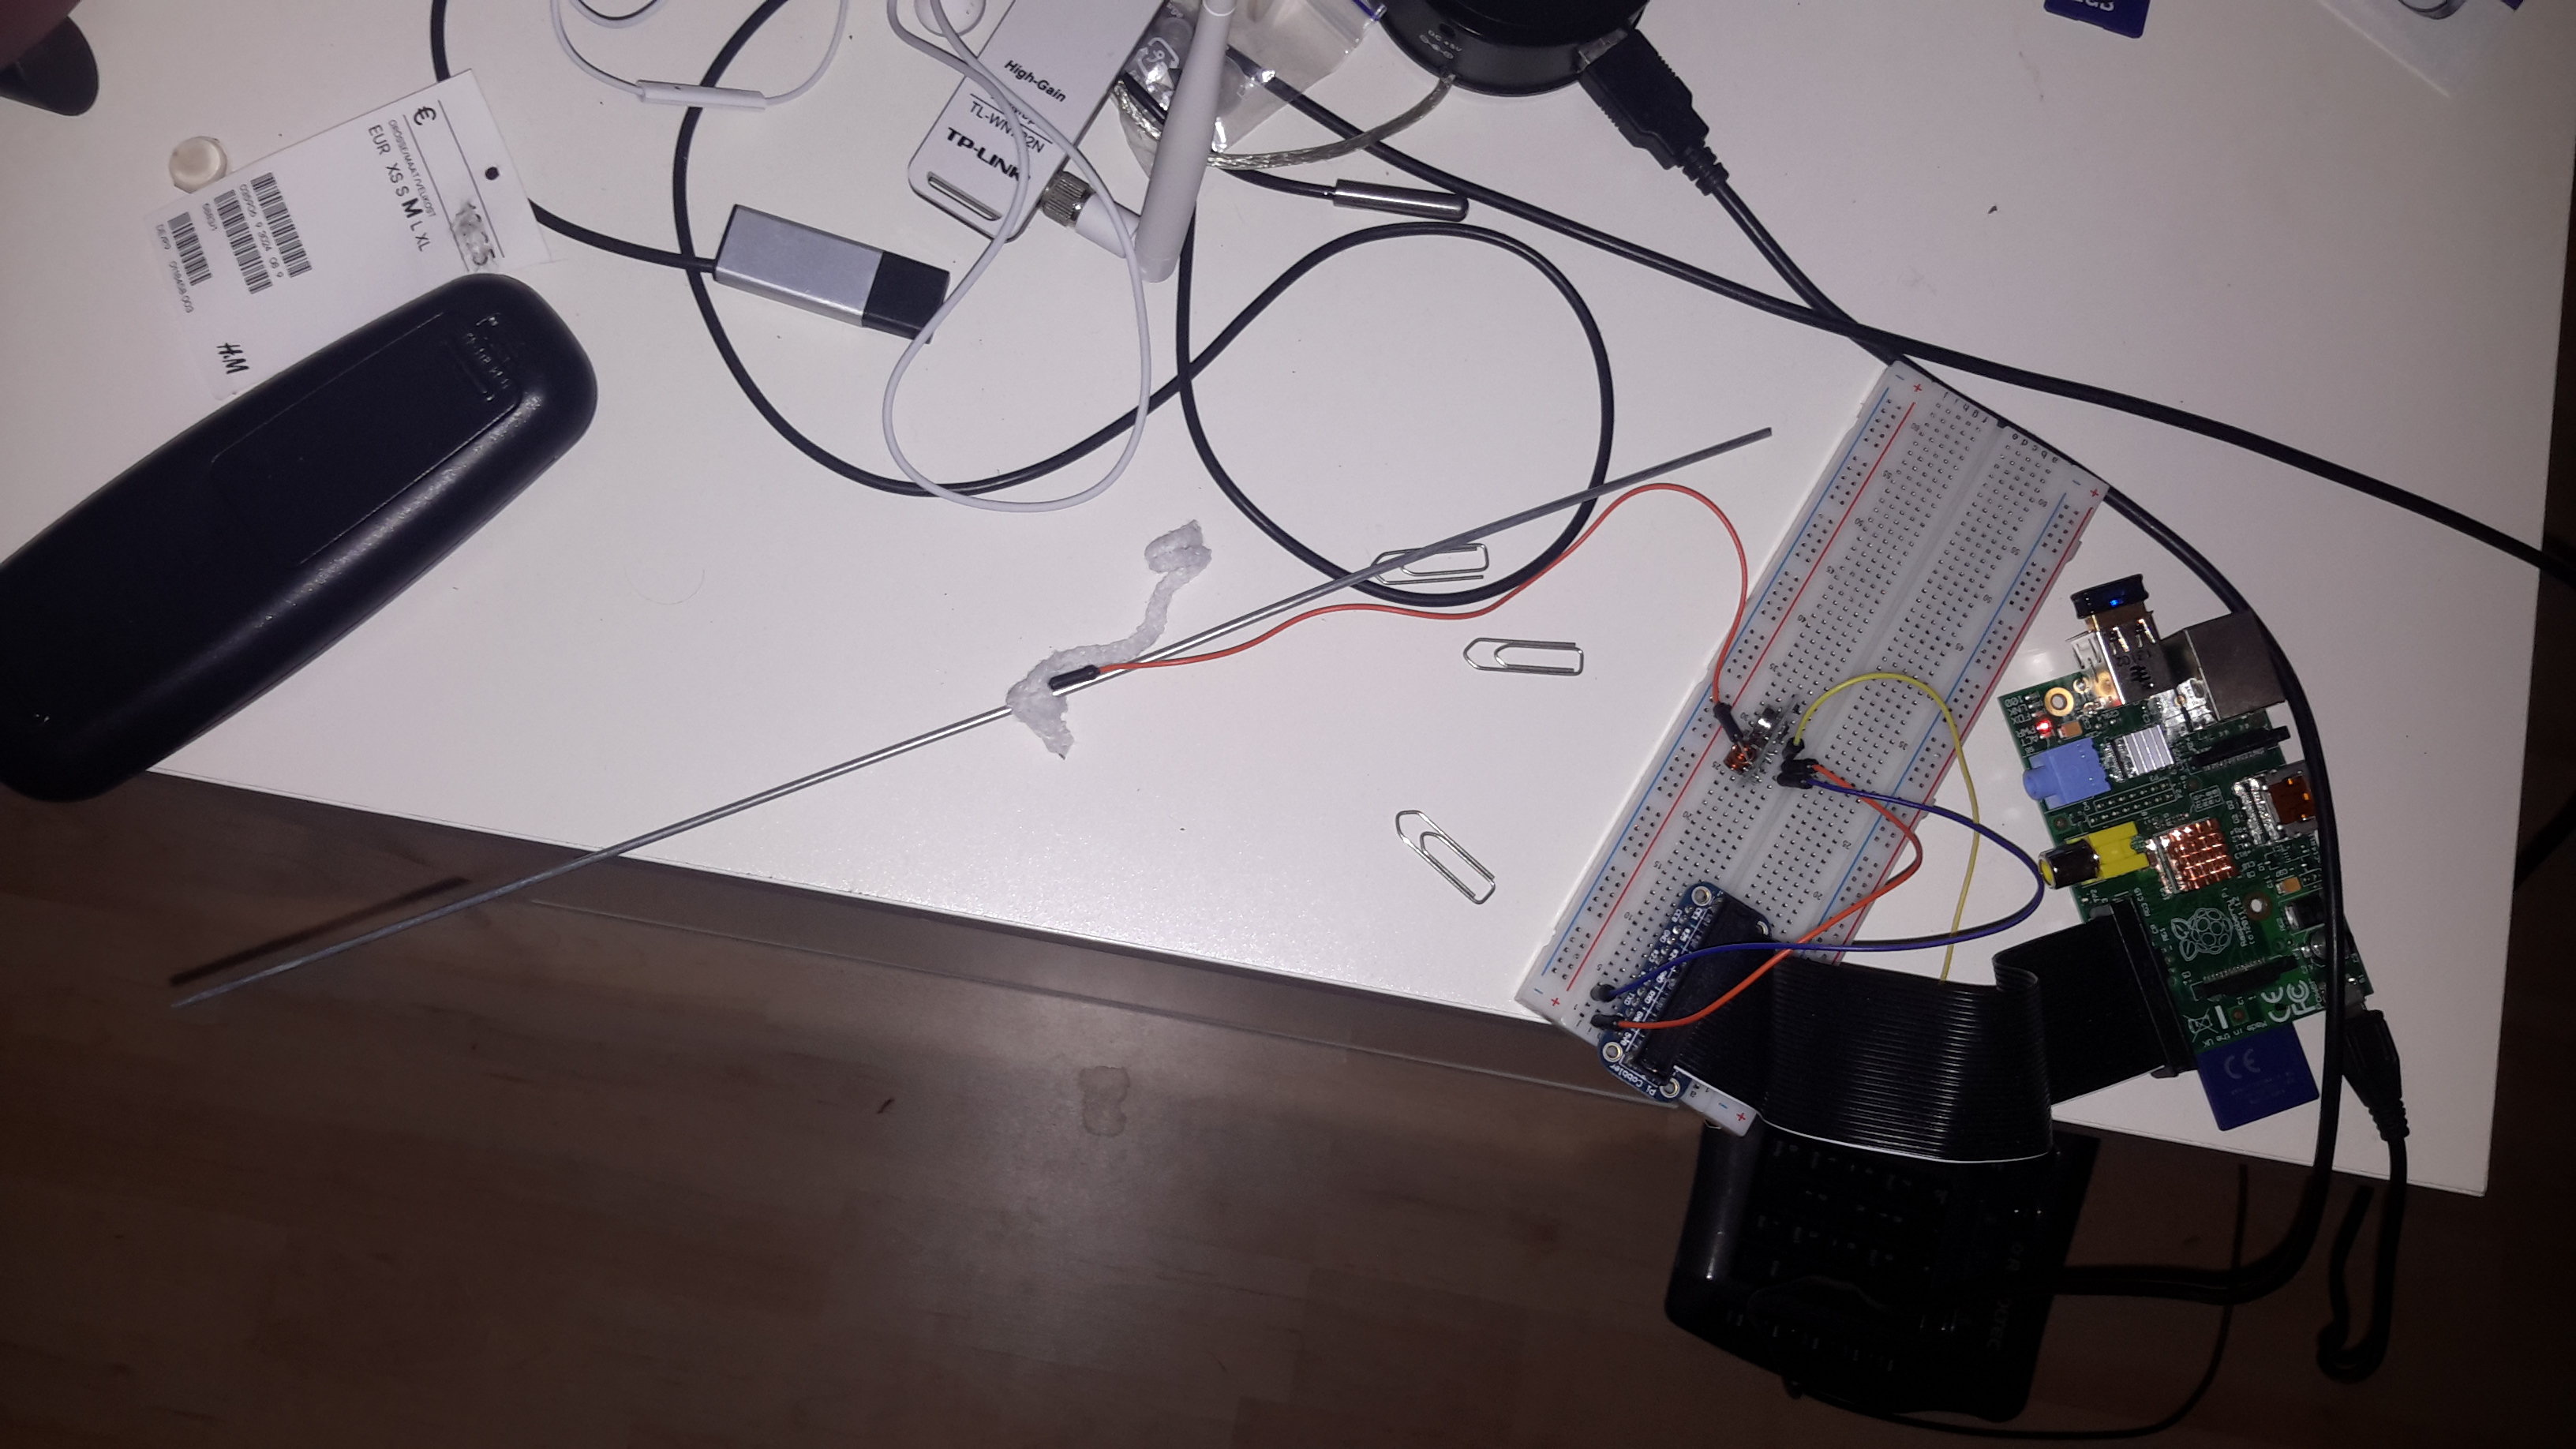
while the default was only able to send its signal a few meters at most before the signal became too weak, adding the middle piece of a coat hanger as an antenna increased the range dramatically. It has something to do with half the length of the wavelength or something, I stopped reading the forums here, because it got way into physics and it worked for me so I could turn my mind to the more important tasks, the software. The point is, the signal is so strong now, that with about 200 tests, not once did my lamp not receive my signal. Also I send the same signal three times within a second when trying to change a plugs state so if one gets lost the other two probably will get through.
Native stack
In order to control the Pi’s GPIO plugs, I needed a mediator between my Spring application and the hardware. Luckily there was already somebody who created a few libraries that managed the most fundamental of problems, sending the codes out via the GPIO pins: https://github.com/r10r/rcswitch-pi
This allowed me to write some Java Native Interface adapters that accessed the shared C library and use its functionality. I had to rewrite some code however, because the library did not support all DIP switch configurations I wanted. A 433mhz Elro chip based plug has 2×5 binary dip switches. So e.g. 01101 00101 would be an address. But the library only allowed one bit to be 1 in the second group. no 01110 11101 was allowed, just 01101 10000 for example. I wanted to have more addresses at my disposal so I changed the code a bit but not too much (see github changelog from sept 2013).
So once this worked and the JNI methods were in place and had access to the libraries (which was quite a hassle believe me), I was able to control any plug in my house from java. yay! But there were still some steps ahead. But before I continue lets look at what I learned from the native work
- C is a language for the really intense ones. I can’t imagine being as productive in C as I am in Java. But maybe thats just a thing of practice..
- Things in the IoT context can be of all different shapes and sizes. So integration and adapters are tools one cannot get around. There will have to be clean and well documented interfaces between the different worlds. I wish I had REST on this level….
- Cheap devices and cheap hardware open the gates for great solutions. But it’s not the 3€ chip in the power outlet that will make the difference, its the software based solution and service built around it
To keep on reading check the other posts about our prototype:


1 Kommentar
Pingback: IoT prototype – low-level thoughts about camunda BPM and Drools Expert (part 6) | The Cattle Crew